 It is not a secret that before installation of a new theme, it is necessary to adapt it under your own blog. Maybe the template is very good, but it is rare when completely meets the needs and preferences of the blogger. After all the developer of a template is guided by broad masses of bloggers, but each blogger wants to have personaly designed blog. For permission of this contradiction usually used “individualization of template”, i.e. little changes of style attaching different useful and useless improvements and modifications.
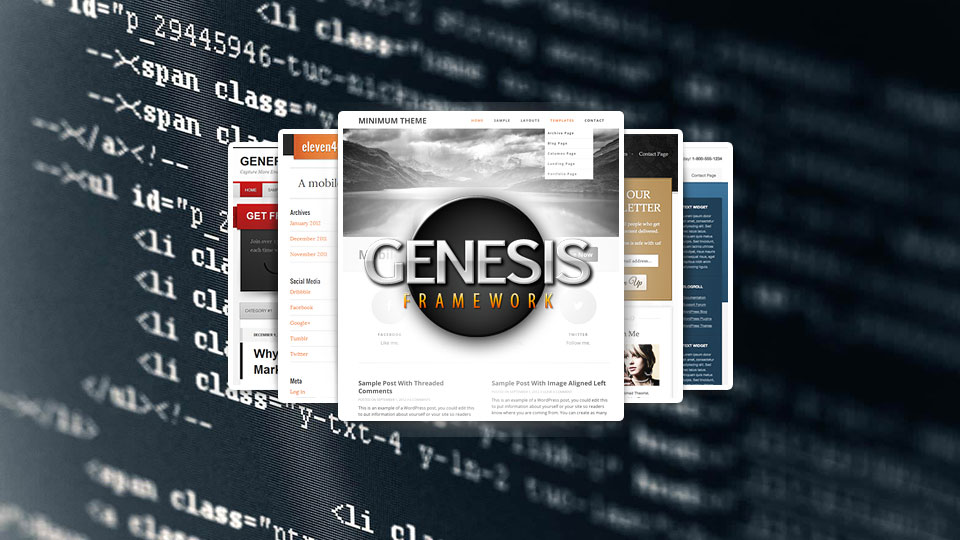
Recently I bought a new template – Lifestyle Child 2.0.1 by StudioPress, based on the Genesis framework. The new version of the template Lifestyle Child finally merged with its twin-theme named Church Child and has undergone significant changes in style. Now it is more minimalistic template, but still very functional. You can verify this by looking at the design of my (this) blog, it uses a template Lifestyle Child.
Of course, not everything was fine for me in this template, and I have made some changes to individualize it for my needs. And all that I made I want to share with my readers. I hope this article will help you to personalize your own Genesis child theme template.
Plan of Works
All work must start with a plan. However, in this case, it is also a list of completed works:
- add new color scheme
- change the header of template – resolve the widget area in the header and reduce the height of the header
- add an extra element “search in the blog” into the secondary menu of template
- add the widget area to a single post page after post content
- remove unnecessary links from the footer
- add localization support for child theme
That’s kind of the whole plan. Let’s proceed to its implementation. We will implement it professionally, without changing files of structure of both the template and framework. The changes will be made to files style.css and functions.php of template Lifestyle Child.
Adding color scheme
Lifestyle Child 2.0 theme comes with built-in 10 color schemes. Unfortunately, only one of them (Blue) suitable for my blog SimpleLib, and for my another blog (blogcoding.ru) was not found suitable color scheme. I wanted the color scheme repeating colors of previous template that has been set on Blogcoding blog – Church Child 1.0. In addition, I would like to footer and header was a dark gray color, both in the same Church Child.
Unlike previous versions, where each color scheme had its own style file, all of the color schemes of this template are placed in the main stylesheet file, it greatly simplifies the task of increasing the number of color schemes.
At first, add a new color scheme “Red” to the scheme selector of theme parameters. To do this, find function add_theme_support in the file functions.php, that defines genesis-style-selector and add one line to define a new color scheme (highlighted in the code below):
|
1 2 3 4 5 6 7 8 9 10 11 12 13 14 15 |
add_theme_support( 'genesis-style-selector', array( 'lifestyle-blue' => 'Blue', 'lifestyle-charcoal' => 'Charcoal', 'lifestyle-gray' => 'Gray', 'lifestyle-green' => 'Green', 'lifestyle-pink' => 'Pink', 'lifestyle-purple' => 'Purple', 'lifestyle-tan' => 'Tan', 'lifestyle-teal' => 'Teal', 'lifestyle-yellow' => 'Yellow', 'lifestyle-red' => 'Red' ) ); |
Then add the definition of header images for the new color scheme (highlighted lines):
|
1 2 3 4 5 6 7 8 9 10 11 12 13 14 15 16 17 18 19 20 21 22 23 24 25 26 27 28 29 30 31 32 33 34 35 36 37 38 39 40 41 42 43 44 45 46 |
register_default_headers( array( 'default' => array( 'url' => CHILD_URL . '/images/header.png', 'thumbnail_url' => CHILD_URL . '/images/thumbs/header-thumb.png' ), 'blue' => array( 'url' => CHILD_URL . '/images/header-blue.png', 'thumbnail_url' => CHILD_URL . '/images/thumbs/header-blue-thumb.png' ), 'charcoal' => array( 'url' => CHILD_URL . '/images/header-charcoal.png', 'thumbnail_url' => CHILD_URL . '/images/thumbs/header-charcoal-thumb.png' ), 'gray' => array( 'url' => CHILD_URL . '/images/header-gray.png', 'thumbnail_url' => CHILD_URL . '/images/thumbs/header-gray-thumb.png' ), 'green' => array( 'url' => CHILD_URL . '/images/header-green.png', 'thumbnail_url' => CHILD_URL . '/images/thumbs/header-green-thumb.png' ), 'pink' => array( 'url' => CHILD_URL . '/images/header-pink.png', 'thumbnail_url' => CHILD_URL . '/images/thumbs/header-pink-thumb.png' ), 'purple' => array( 'url' => CHILD_URL . '/images/header-purple.png', 'thumbnail_url' => CHILD_URL . '/images/thumbs/header-purple-thumb.png' ), 'tan' => array( 'url' => CHILD_URL . '/images/header-tan.png', 'thumbnail_url' => CHILD_URL . '/images/thumbs/header-tan-thumb.png' ), 'teal' => array( 'url' => CHILD_URL . '/images/header-teal.png', 'thumbnail_url' => CHILD_URL . '/images/thumbs/header-teal-thumb.png' ), 'yellow' => array( 'url' => CHILD_URL . '/images/header-yellow.png', 'thumbnail_url' => CHILD_URL . '/images/thumbs/header-yellow-thumb.png' ), 'red' => array( 'url' => CHILD_URL . '/images/header-red.png', 'thumbnail_url' => CHILD_URL . '/images/thumbs/header-red-thumb.png' ) ) ); |
Of course, you have to create these images from already existing images.
Now the most important thing. Find the file style.css. All schemes are marked by comments. Just copy the portion of the file that matches to any color scheme, rename the appropriate class names (eg lifestyle-red) and adjust the colors to your liking. For example as mine:
|
1 2 3 4 5 6 7 8 9 10 11 12 13 14 15 16 17 18 19 20 21 22 23 24 25 26 27 28 29 30 31 32 33 34 35 36 37 38 39 40 41 42 43 44 45 46 47 48 49 50 51 52 53 54 55 56 57 58 59 60 61 62 63 64 65 66 67 68 |
/* Lifestyle red ------------------------------------------------------------ */ body.lifestyle-red { background-color: #d4b5b1; } .lifestyle-red a, .lifestyle-red a:visited, .lifestyle-red #nav, .lifestyle-red #nav li li a:hover, .lifestyle-red #nav li li a:active, .lifestyle-red #subnav li li a:hover, .lifestyle-red #subnav li li a:active, .lifestyle-red h1, .lifestyle-red h2, .lifestyle-red h2 a, .lifestyle-red h2 a:visited, .lifestyle-red #cat, .lifestyle-red .widget_archive select, .lifestyle-red .s, .lifestyle-red .enews #subbox { color: #A91B33; } .lifestyle-red h2 a:hover { color: #A91B33; } .lifestyle-red div.gform_footer input.button, .lifestyle-red .enews #subbutton, .lifestyle-red .reply a, .lifestyle-red .reply a:visited, .lifestyle-red .searchsubmit, .lifestyle-red #submit { background-color: #3a3a3a; border: 1px solid #3a3a3a; } .lifestyle-red div.gform_footer input.button:hover, .lifestyle-red .enews #subbutton:hover, .lifestyle-red .reply a:hover, .lifestyle-red .searchsubmit:hover, .lifestyle-red #submit:hover { background-color: #793b3b; border: 1px solid #793b3b; } .lifestyle-red #footer-widgets, .lifestyle-red #footer { background-color: #3a3a3a; } .lifestyle-red #bbp_reply_submit, .lifestyle-red #bbp_topic_submit, .lifestyle-red input[type="button"], .lifestyle-red input[type="submit"] { background-color: #3a3a3a; border: 1px solid #3a3a3a; } .lifestyle-red #bbp_reply_submit:hover, .lifestyle-red #bbp_topic_submit:hover, .lifestyle-red input:hover[type="button"], .lifestyle-red input:hover[type="submit"] { background-color: #793b3b; border: 1px solid #793b3b; } |
Now we have a new color scheme, which we can choose on the theme options page.
Changing Template Header
If you visit demo page of Lifestyle Child template, you’ll see that the advertising widgets area in the header is not provided for by developers. I already wanted to develop this area, but it turned out that the widgets area in the header is not disabled and can be used. But its sizes are incorrect, and when widget is placing into it, it moves down. To remedy the situation, a small change to a file style.css is needed. Reduce the width of the area to 488px and add padding:
|
1 2 3 4 5 |
#header .widget-area { float: right; width: 488px; padding: 19px 0 0 0; } |
Padding parameters are selected empirically. FireBug (FireFox), Dragonfly (Opera) or “View Code of Item” (Chrome) help you.
In addition to a misunderstanding with the widget I did not like too much height of header (150px). Maybe someone will place very beautiful picture into header, but I do not need it. Quite 100px.
To change the height of the header we need to make small changes to both files. We must change definition of template custom header sizes in the file functions.php. Just change the height to 100px:
|
1 2 |
/** Add support for custom header */ add_theme_support( 'genesis-custom-header', array( 'width' => 920, 'height' => 100 ) ); |
Change the height in two places of file style.css. You must change the height of the header:
|
1 2 3 4 5 6 7 8 9 |
/* Header ------------------------------------------------------------ */ #header { background: url(images/header.png) no-repeat top left; height: 100px; margin: 0 auto; width: 920px; } |
and height of the header image:
|
1 2 3 4 5 6 7 8 9 10 11 12 13 14 |
/* Image Header - Partial Width ------------------------------------------------------------ */ .header-image #title-area, .header-image #title, .header-image #title a { display: block; float: left; height: 100px; overflow: hidden; padding: 0; text-indent: -9999px; width: 300px; } |
Now you can upload an image for the header (192×100) on page Appearance->Title and everything will looks as it should.
Additional element in the secondary navigation menu
In the original Genesis supports an optional element (Date, Search, Feeds, Twitter) only in the primary navigation menu. You can select the desired item on the theme settings page. I wanted to have an element of “Search” in the secondary navigation menu, and use additional item place in the primary navigation menu for anything else. This is done quite simply. We must add two filters (file functions.php) for secondary navigation menu (one for the Genesis, the other for WordPress) and describe inserted element:
|
1 2 3 4 5 6 7 8 9 10 11 12 13 14 15 16 |
// Add subnav menu item add_filter( 'genesis_nav_items', 'lifestyle_sub_nav_right', 10, 2 ); add_filter( 'wp_nav_menu_items', 'lifestyle_sub_nav_right', 10, 2 ); function lifestyle_sub_nav_right($menu, $args) { $args = (array) $args; if('secondary' != $args['theme_location']) return $menu; ob_start(); get_search_form(); $search = ob_get_clean(); $menu .= '<li class="right search">' . $search . '</li>'; return $menu; } |
Additional widgets area
I wanted to display an ad banner between the content of a single post and comments to it, and I did it.
In fact this possibility was in previous versions of the theme, and implemented using the included php-file. Unfortunately, developers at all removed the banner place in the new version of theme. It would be possible to restore the old scheme with the file, but it would mean that if necessary to change ad banner we would have to edit this file. Widget area is much more convenient.
So, the area of widgets. At first, we declare the action for show the widget in the right place:
|
1 2 3 4 5 6 7 8 9 |
// Add sidebar after single post content add_action('genesis_after_post', 'lifestyle_include_adsense', 9); function lifestyle_include_adsense() { if(is_single()) { echo '<div class="sidebar-after-single-post adsense">'; dynamic_sidebar('sidebar-after-single-post'); echo '</div>'; } } |
Then we must register the widgets area. It will allows you to add widgets to a new area on the admin page “Appearance-> Widgets“:
|
1 2 3 4 5 |
genesis_register_sidebar(array( 'id' => 'sidebar-after-single-post', 'name' => __('Sidebar After Single Post', 'lifestyle'), 'description' => __('This is after single post widget area', 'lifestyle') )); |
You may want to customize the output of this widget is not only on a single post page, and on the archives pages.
Changing Text of Footer
Task: Change the copyright string in the footer (remove references to StudioPress and reduce the number of links – there are too much links in the original).
|
1 2 3 4 5 6 7 8 9 10 11 12 13 |
// Customize the footer section add_filter('genesis_footer_creds_text', 'church_footer_creds_text'); function church_footer_creds_text($creds) { global $wpdb; $table = $wpdb->prefix . 'posts'; $lastDate = date('Y'); $firstDate = $wpdb->get_var("SELECT YEAR(post_date) FROM $table ORDER BY post_date LIMIT 1"); $text = get_bloginfo('name').'. '.__('All rights reserved', 'genesis').' · [footer_loginout]'; if($lastDate == $firstDate) $creds = "Copyright $firstDate, ".$text; else $creds = "Copyright © $firstDate - $lastDate, ".$text; return $creds; } |
That was made … Usually the copyright string is displayed by means of Genesis, not of a child theme, on the given template, but before an output the genesis_footer_creds_text filter is applied. If the processor of the filter is defined, the “filtered” text is output. If isn’t present – the default text is output. I set the church_footer_creds_text function as processor of genesis_footer_creds_text filter and reported about it to system. According to documentation the processor accepts one parameter (text original) and shall return a variable with the processed text. In order that it was more interesting, I gave a code of the real processor of the filter from this blog. The filter builds copyright dates (year of writing of the first article – the current year), a blog name, a standard line of a copyright, the link to an login/logout. You can see result of execution of the filter in a footer of my blog.
Support of Child Theme Localization
If you carefully read this article, you may have noticed that the some codes contain a function of this type:
__('Sidebar After Single Post', 'lifestyle')
. This means that the output strings of these functions can be translated into any language using TEXTDOMAIN. In other words, can be displayed in YOUR LANGUAGE. For some unknown reason to me theme developers use TEXTDOMAIN functions, but did not include support for TEXTDOMAIN to template. Let’s correct this oversight:
|
1 2 |
// Load child theme text domain load_child_theme_textdomain('lifestyle'); |
In order that translation happened correctly and really occurred, it is necessary to create translation files. It becomes by means of the program poEdit. Translation files made by poEdit program it is necessary to place in a root folder of a child template.
P.S.
If all that you have read above is for you “bullshit” (well, “delirium of minimus”), but you really want to personalize your theme, do not hesitate to contact me, I can help you for a reasonable fee.
© 2013 – 2018, minimus. All rights reserved.
Well explained. My blog looks cool with Genesis Theme.
Total Comment by Geekyard: 1